Beschreibung
Wichtige Erkenntnisse
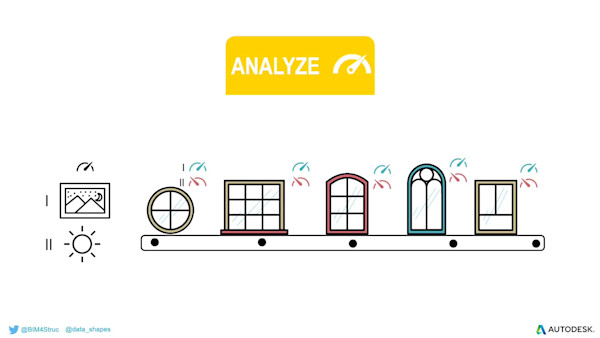
- Discover workflows in Dynamo for producing efficient multifamily design options
- Learn how to implement similar automation processes to minimize downtime
- Learn how to apply multifamily conceptualization in other sectors like hospitality, health care, and more
- Discover innovative design solutions for custom site conditions
Referenten
RAMYA PALANI: Hello, everybody. Thanks for joining us today for Generative Design Using Dynamo for Multifamily Residential. Presenters are myself, Ramya Palani and Harish Palani. Yes, you're right. That's my brother with me as co-speaker.
Our presentation today is sponsored by Perlman Architects, Las Vegas. We are a small office in Las Vegas and Phoenix with expertise in residential, mixed use, and commercial projects. We are proudly in business since 1999.
Today is all about what possibly can the future workflow of Perlman Architects or multifamily residential will look like. I know Perlman has 22 years of history from hand-drafting CAD 3D to BIM interface now.
The firm has transformed along with the AEC industry itself. Before we dive deep into our presentation, we'd like to give a quick introduction about us. Presenting myself, Ramya Palani, I am working as a job captain and BIM technician at Perlman Architects. I have around four years of experience in two countries, India, and the United States.
My previous employers are Gensler, Las Vegas, W Design, Tulsa, RDX, India, and Autom, India. I graduated with a master of science in architecture in the year 2019. I also graduated with a bachelor of architecture degree in 2017.
A fact about me is that I lived in six cities in two countries, traveled around the globe. But I'm not at all a foodie. I also made sure all the six cities were minimum 1,000 miles away from my brothers.
HARISH PALANI: Hey, everyone. Thank you so much for joining us. I'm Harish Palani. I'm pursuing my master of architecture at NC State University from Raleigh.
I graduated with a bachelor's of architecture degree in 2019 from India. Unfortunately, I also ended up being an architect. I love to work at my workshop in my university where I've been living for the past six months, literally. I've also been experimenting with recycling plastics into building materials.
Plus, thanks to my sister, who's always been at my side, that's making me a better man. OK, she made me tell this. That's what sisters do.
Also, guys, please feel free to find our LinkedIn account names. And please reach out to us with any questions that you have.
RAMYA PALANI: Thank you, Harish. That was mean, as usual. The agenda for today's presentation is going to be as follows. Primarily we are going to discuss the evolution of the AEC industry and where the generative design stands in the evolution.
Then we are going to state the learning objectives and goals of this project. Later, diving deep into the design scope and the basics of generative design. From there, site building and unit generations are dealt in a hierarchy. Finally, we are concluding it with an inference and a conclusion.
If we look at the AEC industry itself, all the way from hand drafting CAD, incorporating Excel, visualizing CAD, collaborating, sharing, detecting clashes, it has transformed a lot. Heading successfully towards digital twinning.
However, generative design is still not abundantly used in professional workflow. If at all it is used, it's either for small automation or for conceptual stage. The cons are that it involves industrial knowledge and a lot of coding knowledge. Also, as of now, these are exclusive.
Either it is office specific or city specific. This generative design for multifamily housing is a humble effort put together with our industrial knowledge and coding knowledge with a lot of enthusiasm. The objective of today's presentation is to introduce generative design in multifamily field.
There are few projects done on this realm already. But either those are inaccessible or made into a software itself. This makes it difficult either for purchasing or mastering, or even to know about it. Having said that, our objective for today's presentation is to identify the workflow to produce multifamily design options, implement similar automation processes to minimize design downtime, discover innovative design solutions for custom site condition.
The goals for today is to explore design options for custom site building and units, to understand how generative technology is used in multifamily design, to understand the pros and cons of using generative design itself. Firstly, the design scope and the basics of generative design. We are going to see the idea behind generating options for custom site, then moving on to building envelope, and finally to the units.
Units being the small, yet major factor of multifamily, we are proposing two ideas of how units can be generated, random method, and regulative method. There are obviously many types of construction, but the scope of this project is limited to a wrap layout, rectangular building, and a flip unit.
The project can be expanded or customized to podium, slab, walk up, and construction, and tower construction. Primarily, the basics of generative design.
Generative design is like a mathematical formula where you will have an input, formula, and output. Except we'll have n number of outputs for all possible iterations. Generative design also has a way of filtering it where thousands of options are proportionately reduced to 10 and 20, as per our requirement. After which, the designer will be able to choose the best ones.
Here stage one is the input stage. Here the initial idea will be given as an input, which can either be from Revit, or it can be manual. Or some cases, it can be both. The second stage is going to be the programming stage.
The design restrictions are formulated in Dynamo in the form of algorithms and codes. Stage three is going to be the output stage. Here n number of solutions are formed using generative design where it can be filtered as well.
Stage four is going to be the selection process. However, how many ever options the generative design can generate, the manual selection of design is definitely required by the designer.
HARISH PALANI: Moving on to site solution. So we are doing an extrude and evaluate method. The design scope of this site is limited to the wrap layout. The wrap is typically seen in urban areas where the site is either small or more expensive.
This type is characterized by a building being arranged along the property line like it's being fenced by building, sometimes divided by walkways, roads, or green-space. It usually wraps the parking structure or open area like a courtyard.
Site generation is done based on a series of setbacks and extrusions. Then roads are allocated, followed by splitting the building based on custom requirements. Finally, the efficient and feasible output is chosen.
These are the stages how the graph is generated. Firstly, the input that the user provides. Then second will be the program in the form of algorithm and code using the user inputs. Following is the geometry outputs generated out of the algorithm. Then options in generative design, and finally, the selection of the best solution.
So this is a visual representation of the stages of site generation. The first stage is input. Input in this case will be both Revit and manual input. The site property line is input in the form of a line drawing, which is from Revit.
Then according to the city or county rules, the opposite of walkways, landscape set back, [? road, ?] building width, and height are given as input. Stage 2A is the offset. Based on the input, we can see a set of offsets are generated, which also includes the building width.
Stage 2B would be the custom split. The building footprint that's generated at split, here for the sake of this project alone, random method is used to create the split. Like I said, it can be customized according to county, city, and also designer scheme.
In the next stage, 2C, the split is incorporated with the building footprint forming the required number of buildings. Then in the stage three, the buildings form are given height based on the supplied height input. At the fourth stage, n number of options are generated when the program is spread into the generative design software.
This is an actual graph in Dynamo. I mean to say, this is how we coded it. I've blown up the site inputs and the random parameters to have an idea of what is happening within our script. Here they input a site property line, site setback, internal road width, number of roads, and building width.
At the bottom left is the custom split parameter, which can be customized to the user name, as mentioned before. In this case, we have given it random inputs. The output of this graph, along with this site massing, will generate site area, block coverage, block coverage percentage, which is shown on the bottom left graph.
Comparing the blown up graph and also the overall graph, we could clearly see that the script starts with the inputs that the user will be provided with. Following that will be our script. And towards the end is the output nodes.
Thank you. This graph over here shows the actual interface of the generative design. Over here towards the left shows n number of site options that has been generated from the Dynamo script that we showed before.
If we move down this list, we have n number of options listed now. The right side highlights one of the generated options, along with the block coverage, percentage block coverage, site area, and also the spread condition.
The 1,000 plus site options generated in this case is filtered based on the percentage of block coverage. Here we have 100 plus options with just 35% of block coverage. We can still move on and keep filtering the graph to lesser options to choose the best out of it.
Here the first window is the input screen, after which the generative design software is producing 1,000 plus options, as per our requirements, which we can visually visualize on the bottom blue graph that's being updated as we look at it. We can also see on the top right that the numbers are increasing. That's the pages. Generative design is visually showing us 10 options each page.
We'll get to see it finish for a second. OK, I'm now filtering the options based on site area and block coverage. This filtering will yield a handful of options from 1,000 options. From here, the designer can choose according to the requirements.
Now that the site mass is generated, this will form the basis for the building generation and unit generation. Over to Ramya.
RAMYA PALANI: The next part of this presentation is going to be the building generation. Now that we have achieved site output, the masses after the split can be used to generate the building itself. Building generation is going to be simple.
Here we input the shape. Say rectangular, L shaped, or any custom shape. To remind what we discussed earlier, the building design scope is limited to a rectangular building.
There's going to be a hallway. Along the hallway on either side of the units, either side of the corridor, units and stairwell will be arranged. The graph shows workflow of building creation. The inputs for this graph is going to be all possible units that is required in the building, and, of course, the building length itself. If the inputs satisfy the condition, it will create corridor and units on either side of the building boundary. If the inputs do not satisfy, then Dynamo will go ahead and terminate the whole process.
This slide shows how visually building generation will look like in Dynamo. The first step is selecting the building shape itself. The second step is our condition. The condition here being the sum of width of the units should be equal to the building length.
If it satisfies the condition, then third stage produces building boundary and the origin points of the units. Stage four produces the unit boundaries within the building boundary according to the number of unit requirements that we supply.
In stage five, Dynamo creates surface for the unit flow plan. Then this is extruded and multiplied to the required number of floors vertically.
Building generation in Dynamo will look like this. Here I have blown up the inputs for us to take a look at and understand what's happening in Dynamo. The inputs here are all unit sizes. We are considering one and two bedroom units for this project.
The range of unit width will be from 24 to 38 in increments of two, like 24, 26, 28, 30, up to 38. Other inputs are number of units required in the corridor, building length, and width. The graph is then fed into generative design software to create the most optimized option.
Now that the building is generated, we can move on to unit generation. Like I said, unit generation is going to follow a simple but two different methods of doing it. While designing a unit in an apartment building, there are n number of rules and regulations to follow.
Only the most important ones here are considered for our design scope of unit. In this project, the scope of the unit is constrained to the flip unit, which means the unit has three sides of sealed walls, and only one side of natural ventilation facing the outdoor. We are not considering any corner unit, or L shaped unit, or triangular unit for this project.
The logic behind placing rooms within the units follow a grouping pattern, the natural light not required area and the natural light required area. These are the two grouping categories. Rooms like entry, bath, kitchen, laundry, pantry, coat, closet, linen, and walk in closet can be placed on the walls which does not have natural ventilation. But rooms like living and bedroom, called the habitable rooms by law requires natural ventilation. The grouping helps us zone these rooms, and hence, narrowing the design much, much more.
The first method is random and evaluate method. This method will generate rectangles within the boundary. And the location of the rectangles are evaluated with each other. They are given design scores based on the evaluation.
So like you see, the inputs in this case is going to be lengthen and width of all the rooms, and the unit width itself. If the inputs satisfy the condition, then rectangles are created on non light required zone and light required zone.
The rectangles that's created are evaluated against each other in the Dynamo itself. The evaluations are assigned a score based on the output. The sum of these scores are called the design scores, which is an output itself. The more the design scores, the better the design is.
Here we are discussing the conditions that the inputs must satisfy in order to form rooms within the unit. Condition one is for non light required. So here the sum of width of the rooms should be equal to the unit width.
Similarly, condition two for light required rooms, here when the sum of width of the light required rooms should be equal to the unit width. All the rooms will be produced only if both the conditions are satisfied. Otherwise, it will be terminated.
This is how the unit generation will visually look. Inputs are given in the first stage. These inputs are the dimensions of the rooms and unit width. Like we discussed earlier, it must satisfy condition one and condition two in order to create the unit boundary.
The edges of the unit boundary are then selected, and the origin points for the rooms are created. With the origin points, rectangles are created within the unit boundary, denoting their respective rooms. And then it is extruded to form the whole unit itself.
The unit geometric creation will look like this in Dynamo. I mean to say, this is how we coded it. I have zoomed in the input for the unit generation to understand what is happening there.
Like we see, there's a slider for width of the kitchen, bath entry. This also gives a way to toggle between rooms. Like, for example, laundry room can be toggled. Like if you want laundry room, you can have laundry room. Or else you can just avoid it.
We also have an extra condition here where the unit width will determine the area and length of the whole unit. For example, if the unit width is 24, then the area of one bedroom will be 500 square foot. Similarly, if the unit width is between 26 to 27, then the area of these units will only fall under 650 range square foot.
The interface that you are seeing here is the generative design software. Here the graph random and evaluate is fed, and 24 foot is given as the unit input.
Towards the left corner one can see 1,280 options generated. Generative design uses cross product method here, which iterates every single input against each other, producing 1,000 plus options. In this animation, one can see all the options are arranged according to design score.
On the right, one can see one of the 1,280 options generated along with its input. The graph below indicates all the options in the form of blue lines. You can see the animation on the right where it shows all the options, and it looks nice. Some cases have laundry. The other cases do not have laundry based on the toggles.
Here this example shows the unit generated for 28 foot unit width. Unlike the previous method, here generative design uses optimized method to evaluate the graph. Here the software optimizes by maximizing the design score, hence, producing only 48 options.
You can see in the bottom graph that I still have filtered the 48 to show only five options based on the design score. I have given the design score should be above 24. Here are the designers' work will be much more reduced to choose one or two options from this.
HARISH PALANI: Your creation method, regulative method, is a straight process. In this process, a series of conditions must be satisfied in order to generate composition. The regulative method is more like additional conception method.
With respect to design scope, this method also uses the same grouping logic, which is non light required rooms and light required rooms. Here just to give you a picture of how the graph is constructed in Dynamo, I'll move further and show a step by step process of the construction of this graph.
Step one, unit inputs are supplied in order to create the boundary of the unit. The inputs can also be derived from the building logic where the building layout has been split into units. Over here, you can see the three inputs that are width, length, and height of the unit.
In step two, points are created using cross product of dots, located on the unit boundary. Moving on, the first row of points are isolated. These are the points that form the corridor side width of the unit.
The next step, step four, as I said, this is going to be regulative method. Here placement of my first room, that is my entry, will define all the other units to follow. For example, the entry, obviously, the axis of the whole unit has to be placed on the corridor side.
This does not require light. So it's being grouped under non light required rooms. Entry is given three different locations, start of the unit, midpoint of the unit, and at the end. Now, a rectangle denoting the entry is created based on the supplied width, which you can see on the green rectangle.
We have also brought in a few conditions for the empty space. Say if the width of the unit is less than 30 feet, the empty sides will be 5 across 5 feet rectangle. And the empty space will increase along with the increase in unit width.
Step five. Now, based on the entry location, kitchen and utility area are created. If we look at the three images on the top left indicating the different location of the entry placement, and we could observe that the kitchen and the utilitarian spaces follows it.
The rectangle in the green is the entry. The orange is the kitchen. And the magenta is the utilitarian space. If the entry is on the start, the kitchen will follow the entry, and the utilitarian space will follow the kitchen. Similar conditions goes for the other entry locations.
In step six, both of the spaces are subdivided to accommodate the storage for kitchen area together, while the random method that Ramya explained allows [INAUDIBLE] as a separate room picture. Over here, bath and walk in closet are grouped together as utilitarian spaces, which are subdivided respectively.
The next step, step seven. Similar to like what we have done before for the entry placement, we also have condition for the bedroom placement to be aligned towards the ventilated side. Thus, the point of the outdoor side of the unit is isolated from locating the bedroom placement.
Moving on, we are locating the bedroom on the points that are generated in the previous step. The bedroom is placed on either side, achieving different unit layouts. Then the surface is formed and subtracted from the overall unit surface.
This difference will yield us the living space that you can see in red. Beginning of these surfaces will provide us with the unit massing. The species are color coded according for visual perception.
Here you can see three conditions for the entry at starting point, end point, and midpoint. The options generated are based on n number of conditions and inputs supplied to it that we have seen so far. And the graph on the bottom has helped us in achieving this output by manipulating, thus building the best option for the user.
We are almost edging towards a conclusion. And I also thank you all for your patience. This would be adding inference to our work on this topic. First, thorough understanding of the design scope is necessary with accurate design goals.
Second, generative design can be used to generate n number of options. Third, one can customize the graph to an ideal situation, and it can be followed perfectly. The fourth one, multifamily graphs can be optimized for specific or multiple situations or conditions.
For example, it can have a specific graph option for [INAUDIBLE] construction or podium construction. This purely depends on the requirement of the user. The next, design options can be quantified mathematically, helping to choose from the appropriate one.
Six, the time consumed by an experienced designer team of four to design 100 units multifamily option would take around two to three weeks. But at the rate of design, would take less than half a day, including the manual selection process. As it is using Dynamo interface, modeling in Revit will be quick, as we can use the outputs that's generated.
RAMYA PALANI: We'd like to conclude the presentation by saying generative design can be used in multifamily to produce efficient design options with further detailing of the graph. Also, it can be used to produce innovative and quantified design.
We'd also like to take a moment to thank all the listeners and Autodesk for such a huge platform. If our conditions do not change, we'd like to continue working on this and present in AU 2022. We really hope to do so. Thank you, thank you, one and all. Our Q&A session will resume after this.
Downloads
Tags
Produkt | |
Branchen | |
Themen |

Unlock the Hidden Super Powers of Dynamo

Dynamo and AEC Generative Design Product Briefing

Generative Design in Revit for Workspace Layout
