
We all love Dynamo. It introduces visual programming to our daily workflows and makes task automation accessible to non-developers. It's great for prototyping and testing. However, Revit macros and extensions and Forge APIs offer many automation opportunities that cannot be technically exposed through Dynamo. This article aims to help Revit and Dynamo users think outside the box by introducing real-case customer success scenarios in which these advanced and powerful Forge and Revit features have been implemented—proving that you can literally make anything with Forge and Revit when you explore both solutions in depth.
Why Go Beyond Dynamo?
Almost all tasks can be automated using Dynamo, from submittal and export operations, to automated element creation and placement, to Q/A and model cleanup. All those repetitive tasks can be automated using Dynamo, which also has the potential to take you to the next level through generative design and many other advanced R&D ventures that you may be willing to explore.
However, if you’re limiting yourself to the built-in Dynamo functionalities without exploring other available APIs, you're missing out on many opportunities that may take you and your company to an even higher level of automation.
We'll look at two main topics: advanced in-product automation through the Revit API, and cloud automation through Forge and its many APIs, as a long era of cloud computing is here.
Part 1: Advanced Revit API Workflows
Dynamo consists of built-in nodes that users place and connect in a certain order to build a useful script. These nodes are actually static methods within class libraries. These static methods are themselves built on top of the Revit API and are meant to perform a certain task that may be used repetitively within a certain script.
Therefore, when you are building a Dynamo script, you would be limited to the nodes that you have available. If any functionality is not available out of the box or hasn’t been developed as a node by a third-party entity, you’re rather stuck. That’s one of Dynamo’s limitations, and it’s not Dynamo’s fault: it’s one limitation of visual programming. In fact, visual programming doesn’t give you enough low-level control.
Fortunately, to overcome that limitation, one great node has been made available out of the box. That node is the Python scripting node which is a “universal” node allowing users to access the Revit API within Dynamo whenever a non-exposed functionality is needed. Any advanced user would start diving deep into the realms of the Revit API at a certain tipping point of their automation journey, driven by a thirst for more superpowers.
As the evolution into text-based programming is a must to break free from the limitations of visual programming, isn’t it better to do that within an IDE instead of doing it as part of a Dynamo script? And wouldn’t that gradually reveal more features that would take your automation journey to another level? Let’s explore the other forms of Revit automation available and their benefits.
The Revit API and Automation
There are several ways to implement the Revit API. I can think of four: one is Dynamo of course. Another is Forge Design Automation for Revit, which will be presented in more detail later on. For now, let’s talk about two: add-ons and macros, starting with the latter.
Revit Macros
Most are familiar with Dynamo’s pushbutton under the Manage ribbon tab. What many are not familiar with is a colorless, much smaller pushbutton right next to it: it’s the Macro Manager pushbutton.
A Revit Macro is a form of automation that consists of a script that can be written within an IDE that ships in with Revit (that IDE is SharpDevelop and is an Open Source alternative of the more popular Visual Studio IDE). These scripts can be C# scripts, VB.NET scripts, (Iron)Python scripts, and, for releases prior to Revit 2022, Ruby scripts.

Macros come in two forms: application macros, which are stored locally and accessible throughout different Revit instances, and document macros, which can be embedded within a Revit model and can thus be accessed by all the collaborators working on that model and which can be set to control that model at certain predefined events.
One thing that would be recommended if a user is migrating from Dynamo scripting and wants to start exploring the Revit API is for him/her to start by converting his/her Dynamo graphs into Revit macros, whether those macros are C# ones or Python ones. As a matter of fact, and once a user starts to include Python scripts into his/her Dynamo graphs, the need for graphical nodes decreases and he/she is ready to start writing that same algorithm as a full text-based script since Visual Programming becomes almost useless once a user is advanced enough to write his/her own code. Even for Python scripts, having an IDE with a functioning autocomplete feature and live debugging would make that process way easier and enjoyable.
Macro development is usually easier to deal with than add-on development, as the IDE is easily accessible within Revit, and the macros can be easily tested from within the Macro Manager (which has an interface that’s similar to that of Dynamo Player with a more nostalgic vintage appearance) without having to set the environment up for debugging.
Revit Plugins/Add-Ons/Extensions
A mystery that will never be solved is the difference between plugin, add-in, add-on, and extension. To many they mean the same thing. What matters for now is their common definition.
A Revit add-on is a compiled class library that is loaded by Revit on startup and that integrates within the Revit interface and environment to perform additional functionalities and modify or monitor built-in ones.
Unlike Dynamo scripts and Revit macros, add-ons require an external IDE to be developed (although an experienced developer can use the one that ships with Revit to develop an external application). That IDE can be Visual Studio, or, if you’re an Open Source fan, SharpDevelop.
Add-ons are the ultimate form of Revit Desktop automation. They have one disadvantage: learning to build them is a bit hard. However, starting an automation journey with Dynamo, and following it up with Python scripting and macros, should ease that process and make it an enjoyable venture.
Macros and add-ons offer many advantages, the first of which being easier deployment and embedding. Deployment is a challenge for companies, and the bigger the company is, the bigger that challenge becomes. Dynamo scripts and macros are ideal when a BIM manager is prototyping or even building a final script that he/she will be using alone. But whenever a certain functionality needs to be used by every team member, deploying Dynamo scripts becomes a nightmare, and there’s always Murphy’s law to take into account: something may go wrong during deployment or during operation, especially given that these scripts can be edited by anyone.
To ensure a safe deployment, a packaged add-on is the best way to go. An installer can be built to be deployed remotely on every workstation, which ends up reducing the time required for deployment and making sure that the end solution would be easily accessible by end users.
As all the components are compiled, there is less risk of having a new inexperienced user modify the code by mistake. Even if the BIM manager or developer would generously like to expose his/her code for educational purposes to the rest of the team, he/she can do so without worrying about the end solution being altered in case it’s modified later on, as the end solution is a compiled one and independent of the initial solution.
Many great third-party solutions are attempting and succeeding in solving the deployment issue of Dynamo scripts. Still, that involves integrating a third-party extension within a company’s workflow, so it’s back to add-ons.
Another great feature is the document embedding of macros. Embedded macros have the advantage of making a script available to all collaborators without any deployment hassles, as the macros are embedded within the Revit model.
Runtime Performance Enhancement
Many know that add-ons (and macros) have a better runtime performance than Dynamo scripts. (To be fair though, the Autodesk Dynamo team is doing a great job closing the gap with every release.)
What many may not be familiar with are the reasons behind that, and the scale of that runtime performance enhancement. One of the reasons is again due to Visual Programming: when less control is available, less optimization can be achieved. As the nodes are prebuilt, there are many operations that may be common between two successive nodes that cannot be combined within Dynamo and that can be combined through a conventional text-based script.
For instance, and through text-based programming, the number of iterations and of document commit operations can be reduced: basically, whenever a document modification is required, a commit operation is required to modify the document. That operation regenerates all the elements of the model each time, which ends up impacting performance. This may be happening internally within many (if not all) nodes, while the entire script may require only one commit operation. That would be one of the factors that may affect the overall performance and add to the processing delay.
Another disadvantage Dynamo has performance-wise is that, and to avoid DLL conflicts, many libraries are dynamically loaded, which also increases the processing time.
In addition, and in order to be compatible with the .NET Framework, a Python interpreter that is built on top of the .NET Framework would be needed, in this case IronPython, or, starting with Dynamo 2.7, CPython3. IronPython can be 32 times slower that an equivalent solution built directly on top of the .NET Framework which is another reason to switch to macros and to a .NET compatible language once text-based scripting is mastered.
Here’s a real-case example to illustrate the improved processing time of an extension, compared with an equivalent Dynamo script: out of the many Dynamo conversion jobs we have completed, one involved a sheet generation and viewport placement script. The final product was able to reduce the execution time to 45 seconds compared to the Dynamo script’s execution time of 18 minutes. The original script was a very well-built one, and all it needed was to be rebuilt into an add-on and optimized. A lighter script may not be worth the trouble, but for complex ones, it can make a huge difference.
Customized User Interfaces
A user interface is always a requirement for any application, as it allows users to specify the input required by that application’s back-end engine to do its magic.
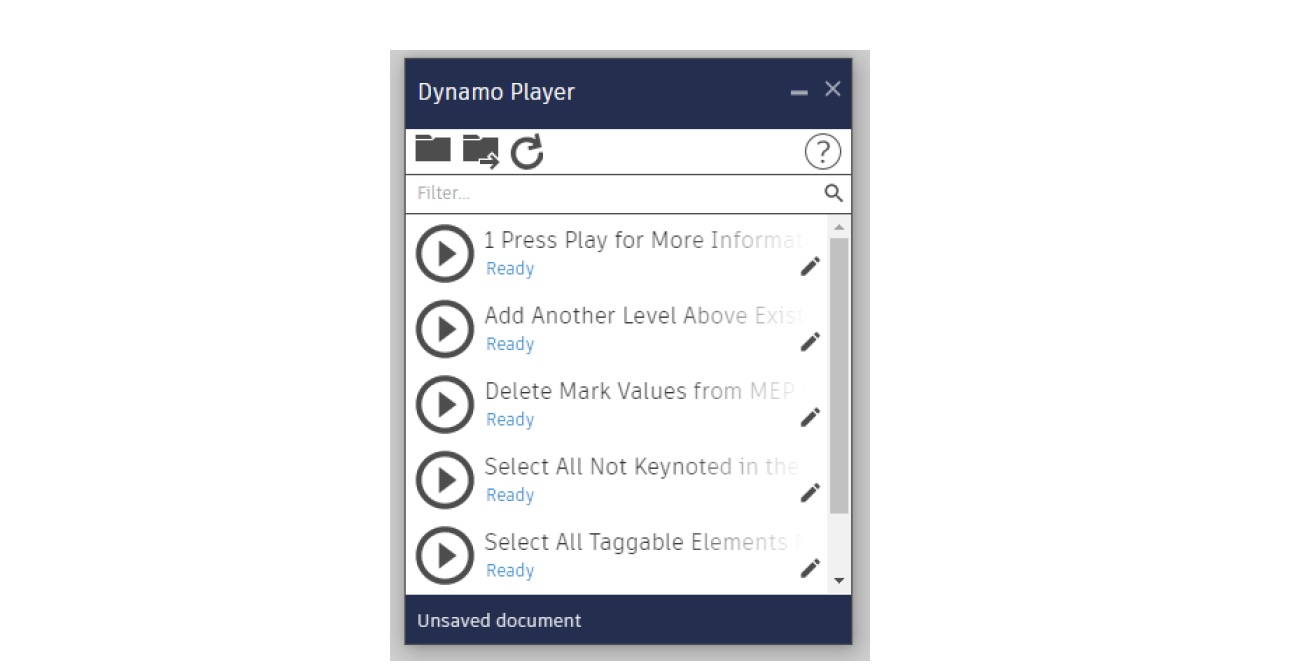
Dynamo out of the box doesn’t provide any way to customize the user interface of its scripts. The only quick access tool for Dynamo scripts is Dynamo Player, which lists the scripts to be executed by the user. So, the user needs to open Dynamo Player and execute the scripts manually, which in itself is a waste of time.
Add-ons can be built to customize the Revit ribbon, and the developed external commands can therefore be accessed through pushbuttons like any other built-in Revit command. Keyboard shortcuts can also be assigned to these pushbuttons for an even quicker access. That itself would make a huge difference once the automation tools you develop need to be accessed on a daily basis by every team member.
Again, many third-party developers have built excellent add-ons to map Dynamo scripts to the Revit ribbon and give Dynamo that same advantage, but again, you’re back to using add-ons, so why not build your own directly, knowing that such add-ons are always risky as they may be a cause of DLL conflict with some of Dynamo’s libraries.
Creating new pushbuttons is not the only interface customization that one is able to make when he/she goes deeper into the dark realms of the API: a developer can also override built-in commands (technically known as command binding) or have a certain routine run prior to a certain built-in command or right after it. That is useful whenever any built-in command is required to be disabled, for example, so that no one uses it.
A well-known example is the Import CAD built-in command, which can be overridden and bound to an alternative command that displays a text message (also known as a TaskDialog) denying the user from using that tool. More customizations can be made as well, if one wanders around libraries that are “not really part of the Revit API.” One particular example is the AdWindows.dll library, which would allow you to customize the interface to a greater extent, by colorizing the controls or moving built-in pushbuttons across tabs.

In addition, creating interfaces where users can specify the input for the algorithm is crucial and is one of the advantages of the ".NET way." For a Dynamo exclusive workflow, nodes that are specified as input nodes can have their values controlled within Dynamo Player which many times may not be enough, is not straightforward, and is slower for users.
Once more, many third-party developers have created custom Dynamo node packages to allow Dynamo users to include a Windows interface in their graphs. As great as that is, these interfaces cannot be customized to the full potential offered by the .NET Framework, for both WinForms and WPF forms.
In fact, you can customize your form’s layout, make its shape unusual, make it more compact when a compact form is required, and expand it whenever an algorithm is advanced enough to require a multitude of inputs.
Moreover, you can build your form to be a modeless one: that form would be opened once per session and kept open while working, allowing buttons, sliders, checkboxes to modify elements dynamically in your model. If you’re looking for an example to inspire you build your own app, you can check out Bird Tools’ Tag Alignment Tool. It’s an Autodesk App Store add-on that can control tag angles. It features a modeless Annotation Dashboard that users can open once per session and keep opened on the side or on a secondary screen while working. As soon as a group of tags or text notes are selected, their leader angle can be dynamically controlled and specified using the slider (see image below). For an even better visualization, check out the demo videos that show this feature in action.

An additional UI option one can go with is a dockable panel. Examples of built-in dockable panels include the project browser, system browser, and property panel. A custom panel can be built and docked anywhere next to these built-in panels.
Revit Events
To take your automation to an even higher level, you can monitor many of the built-in Revit events through the Revit API and execute an instance of automation as soon as these events are triggered.
The best way to define Revit events and simplify the concept is to enumerate them. Events that are accessible through the Revit API include but are not limited to element placement, element modification, element deletion, document opening, document closing, document saving, document synchronizing with central, Revit application instance opening, Revit shutting down. Whenever one of these actions happens, an already defined monitor can be triggered to perform a defined action. Even more, it’s also possible to perform custom actions when the model is completely idle through idling events.
Some of the potential applications of Revit events include auto-saving/synchronizing with central when a model is idle. Another great use of both Revit macros and events would be an embedded Revit document macro that sets the active workset automatically as soon as a model is opened.
Let’s illustrate that with another real-case example that we worked on at Bird Tools. Back when BIM 360 Design was first introduced, the old Revit communicator was dropped and since the worksharing monitor doesn’t support BIM 360 models, a worksharing monitor was needed for BIM 360.
After many requests in the Autodesk forum, we decided to build our own and make it public. It’s called Raven and it monitors worksharing events and reports these events back to a central cloud-hosted server, which in turn sends a notification to an instant messenger that the entire team uses, whether it’s the instant messenger that comes with Raven, or any of the popular team communication platforms such as Zoom, Microsoft Teams, and Slack.
Want more? Download the full class handout to read on.
Majd Makhlouf is a mechanical engineer and design technologist, with a master’s degree in Mechanical Engineering. He's an Autodesk Revit Certified Professional and a member of the Autodesk Developer Network. In January 2020, he founded Building Information Researchers and Developers, a software development company based in Estonia and providing services for the AEC sector worldwide. He specializes in BIM management, Autodesk Revit and AutoCAD add-in development (both public and custom developed), Forge web and cloud-based apps, Dynamo Zero Touch Node Packs, and mobile VR/AR applications.
Ghida Shehadeh is an electrical engineer with a bachelor’s degree in Electrical and Computer Engineering from the American University of Beirut, where she also worked as a teacher assistant and collaborated on several research projects as a research assistant. Her research and documentation contribution within the IoT domain were featured at the 2020 IEEE International Symposium on Antennas and Propagation and North American Radio Science Meeting. Currently she’s an electrical engineer at EMDC Group, one of the most renowned Engineering Design and Consultancy firms in the MENA region, where she benefits from her Autodesk Revit and Autodesk AutoCAD proficiency and dedicates her passion for engineering and love for advanced technology and automation to overcome daily challenges, ensure the highest quality of project deliverables, and contribute to her company’s success.